Crawl Space Repair Before & After Photos
Click on a photo to enlarge.
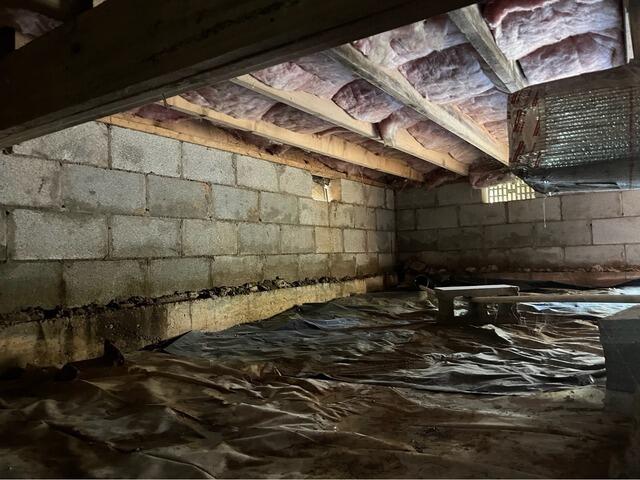
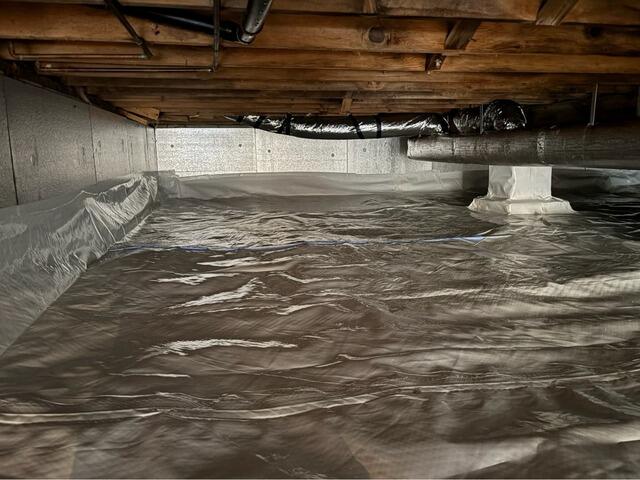
Crawl Space Repair Contractor in Frenchburg, Kentucky


In Frenchburg, KY, the homeowner of a 20-year-old house faced a challenge with a 2-foot clearance crawl space plagued by moisture issues, leading to potential structural risks and unpleasant odors. In the before photo, see the impact of excess moisture affecting the environment within. By installing our CleanSpace® encapsulation system as highlighted in the after photo, we created a barrier that effectively manages dampness, turning the area into a clean, secure foundation. Trust in The Basement Doctor of Central Kentucky ensures peace of mind and longstanding results.
Crawl Space Moisture Removal in Paint Lick, Kentucky


This drenched crawl space looked like a rainforest before we came and encapsulated it. We first waterproofed the crawl space, then we installed a vapor barrier, then we sealed the crawl space vents, then we set up a dehumidification system. These four steps will ensure a dry crawl space for a long time.
Crawl Space Repair in Cynthiana, KY
This crawl space in Cynthiana, KY, was wet, humid, and musty before we transformed it with an encapsulation system. We started by ripping out all the fiberglass insulation in the ceiling and hauling it away to our truck. Next, we installed our SilverGlo insulation around the walls of the crawl space to keep the space warm during the colder times of the year. Lastly, we sealed the entire space from the ground by wrapping our 20 mil CleanSpace vapor barrier across the floor, around the columns, and up the walls of the space. Unseen in the photos, we also installed our dehumidifier to keep the trapped air in the space dry as well.
Crawl Space Repair Company in Mount Vernon, Kentucky


This homeowner had a crawl space with a thin plastic barrier covering the floor. The homeowner quickly realized that they were going to need more than that to keep their crawl space healthy, so they give us a call to install a sump pump system, a dehumidification system, an encapsulation system, an insulation system, and a sealed access door. Having just a thin layer of plastic on a crawl space floor isn't enough to stop moisture from rising into your crawl space, and its important to take all the necessary steps to guarantee a healthy crawl space.
Crawl Space Repair Company in Berea, Kentucky


This homeowner gave us a call because they were concerned with their wooden framing in their crawl space. The homeowner informed us that their crawl space was not that old, and they were pretty upset at the condition it was in. We informed them that they called us at the right time, because had they waited longer, the wood may have grown past the point of safe. We then told them more about our encapsulation process, and how it could save them lots of money in the long run by being able to save the wooden framing. We also informed them of one spot where the wooden frame could use a little extra support with one of our SmartJack posts. By installing our CleanSpace vapor barrier over some drainage matting, our SmartJack post, our SilverGlo foam insulation panels, our waterproofing system connected to a SmartSump sump pump, and a SaniDry Sedona dehumidification system, we were able to guarantee they won't have to worry about the health of their wooden framing any longer.
our service area
We serve the following areas
- Albany
- Bagdad
- Bethlehem
- Bradfordsville
- Breeding
- Burkesville
- Campbellsburg
- Campbellsville
- Carrollton
- Columbia
- Dunnville
- Elk Horn
- Eminence
- Finchville
- Fountain Run
- Gamaliel
- Ghent
- Glens Fork
- Gradyville
- Gravel Switch
- Greensburg
- Hestand
- Jamestown
- Knifley
- Lebanon
- Loretto
- Mackville
- Mount Eden
- Mount Hermon
- New Castle
- Pendleton
- Perry Park
- Pleasureville
- Port Royal
- Raywick
- Saint Catharine
- Saint Francis
- Saint Mary
- Sanders
- Shelbyville
- Simpsonville
- Smithfield
- Springfield
- Sulphur
- Taylorsville
- Tompkinsville
- Turners Station
- Waddy
- Willisburg
- Worthville